


How to sharpen your kitchen knife
There are 3 main tools that chefs can use to sharpen their non-serrated kitchen knives. Click on the links below to find instructions on how to use them:
Steel
* All prices quoted do not include VAT
How to use a sharpening steel
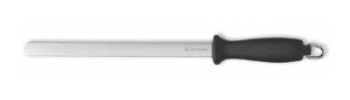
Most chefs will be familiar with a honing or sharpening steel. For those just starting out in the trade, here is a step-by-step guide on how to correctly use this important piece of equipment.
Step 1
Hold the steel firmly by the handle and place the tip on a hard surface, keeping the steel vertical at an angle of 90 degrees to the surface (position 1).
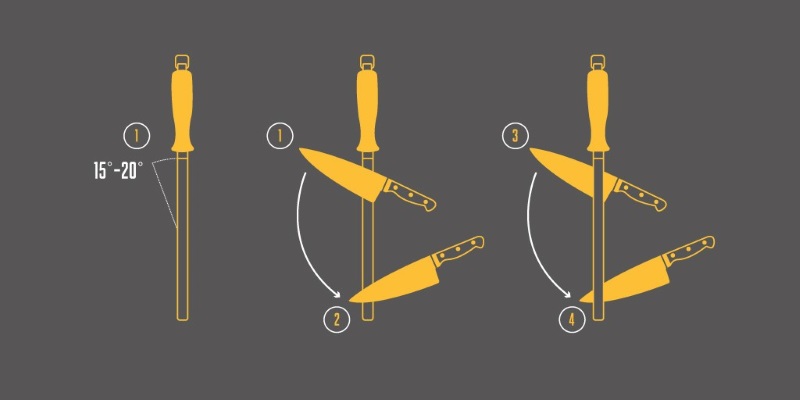
Step 2
Firmly hold the knife by the handle and place the back edge of the blade (the part of the edge nearest the handle) against the steel at an angle of between 15 and 20 degrees (position 1).
Step 3
While applying pressure and maintaining the angle, pull the blade so its whole length firmly presses against the steel, until you reach the tip (position 2). While pulling the blade, also move it down the steel in a sweeping motion (from position 1 to position 2).
Step 4
Place the blade on the opposite side of the steel (position 3) and repeat the motion so the other side of the knife’s edge undergoes the same process (move to position 4). Repeat until you have performed around 10 strokes per side.
It is important to note that in most cases, a steel does not actually sharpen your knife. Most steels are used for honing. This is when the steel simply pushes the microscopic ‘teeth’ found on the edge of the blade downwards, aligning them in one direction. (For further explanation, see the table below.)
|
Honing |
Sharpening |
|
Sharp knives can become less effective through constant use. Though an edge seems even, it is actually made up of tiny ridges or teeth. These ridges can become bent to the left or right of the axis of the blade, reducing the knife’s effectiveness. The act of honing forces these teeth to point straight down in the direction of the blade’s down axis. It is recommended that this should be done before each use of the knife. |
After repeated use, the metal of a blade can wear away. If a flat edge is created, the blade is dull and will need to be sharpened. This process involves shearing off bits of the blade’s metal to create a new edge. To make this edge, the blade will have been ground to produce angled sides that meet at a point. Sharpening only needs to be performed a few times a year at most. Too much sharpening will reduce its lifespan. |
Useful facts
- For the best results, choose a steel that is longer than the blade you intend to sharpen or hone.
- A crucial difference between honing and sharpening is that during honing, no actual material is removed from the blade.
- Honing steels are usually made from steel, whereas sharpening steels can be ceramic or steel coated with diamond grains.
- Sometimes the word ‘honing’ is incorrectly used to mean both straightening and sharpening.
Whetstone
|
|
Product |
Price |
|
Whetstone |
||
|
|
||
|
|
Global Whetstone Holder S/S With Ceramic 5mm Orange Medium Finishing |
|
|
|
||
|
|
||
|
|
||
|
|
||
|
Kit |
||
|
Accessory |
||
|
|
* All prices quoted do not include VAT
How to use a whetstone
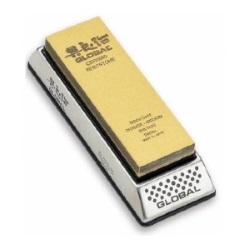
Whetstones are used by chefs who care greatly about their kitchen knives. A whetstone takes away less of the blade’s material than other methods, and allows for greater precision and control when sharpening. Chefs who own expensive knives, especially Japanese-style knives, will tend to use a whetstone.
Step 1
Unless otherwise stated, whetstones require a lubricant of either water or oil for the best sharpening results. The choice of lubricant is up to you; however, once oil is used, that whetstone cannot be used with water in the future. Oil can be used on stones usually lubricated with water. Most stones will carry instructions on which lubricant to use.
When using water, it is advised that you soak the whetstone for 10 to 15 minutes, or until small bubbles stop appearing on its surface.
Step 2
Place your whetstone on a flat, even surface. Hold the handle of the knife in one hand and place the fingers on your other hand near the tip, so the blade is flat against the stone with the edge away from you. Tilt the blade by pivoting on the edge to an angle of around 20 degrees (position 1).
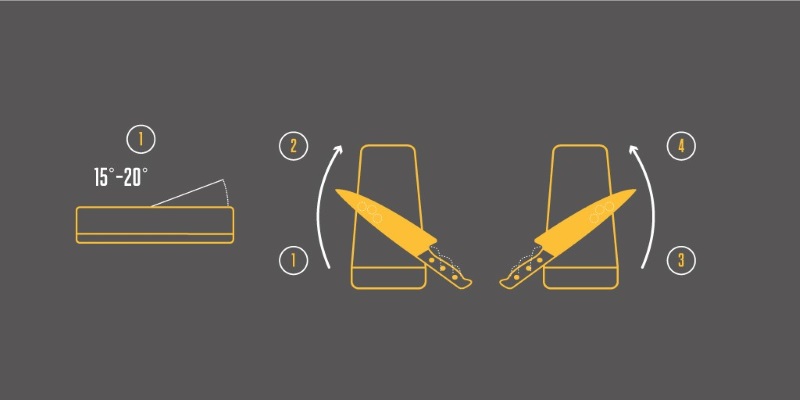
Step 3
Push the blade away while at the same time moving the blade across the surface of the stone in light, even swipes. Make sure to run the whole length of the blade over the whetstone (position 1 to position 2).
When you first begin, it is advisable to only sharpen on the push stroke, making sure to count how many strokes you use so you can sharpen each side evenly.
Once you are more confident, you may wish to attempt a back and forth motion, though it is important to maintain the same angle for both directions.
Step 4
Swap hands and repeat the operation to sharpen the other side of the blade (position 3 to position 4). You should be able to feel the metal grinding against the stone. It is usual, and desirable, for a fine silt to collect on the blade. This material is from your whetstone and shows that you are achieving the desired grinding effect. However, be careful not to over-sharpen. This will shorten the life of your knife and can affect its balance.
What is whetstone grit?
The ‘roughness’ of a whetstone is measured in ‘grits’. The unit was originally coined to represent the number of sharp particles per square inch of surface. However, as the different materials that whetstones are made from vary in particle size, some measures are not equivalent. For example, a synthetic whetstone made from aluminium oxide graded at 1,000 grits may have a different roughness than a 1,000 grits whetstone made from natural material.
Useful facts
- Length of stone. As a rule of thumb, use a whetstone that is as long as the length of the longest knife you will be sharpening.
- The lower the grit number, the coarser the stone and the more material it will remove from your blade.
- A medium whetstone of between 1,000 and 1,500 grits is best for regular sharpening. A finer stone of over 2,000 grits should be used to fine polish the blade.
- The more worn the knife, the coarser the stone you want to start off with. This will remove more material in order to quicker gain an edge.
- Special guide rails can be used at first to keep your knife at the correct angle. In time, you will learn how to maintain the angle you want without the guide.
- Put your whetstone on a damp cloth to stop it rocking or moving about.
- A ‘fix stone’ is a coarse stone used to grind away any notches or grooves that might develop in your whetstone. These grooves hinder a whetstone’s effectiveness.
Tabletop sharpener
|
|
Product |
Price |
|
Manual |
£28.00 * |
|
|
|
||
|
|
||
|
|
||
|
|
||
|
|
||
|
|
||
|
|
||
|
|
||
|
|
||
|
|
||
|
|
||
|
|
||
|
|
||
|
|
||
|
|
* All prices quoted do not include VAT
How to use a tabletop sharpener
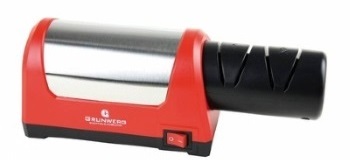
Tabletop sharpeners are a quick and convenient way to sharpen your kitchen knives. A tabletop sharpener can be pulled out in the middle of service and used with little fuss.
Step 1
Place the sharpener on a flat surface and insert the edge of the blade into the sharpening at the end nearest the handle (position 1). If the sharpener has 2 or more stages (2 or more different levels of coarseness), use the roughest stage first, as this will provide a greater sharpening effect.
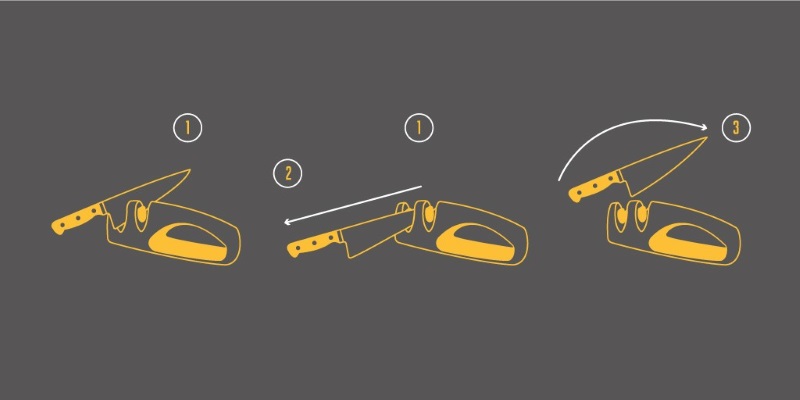
Step 2
Evenly pull the knife towards you, applying enough pressure to feel the grinding effect on the blade. Take care not to push down too hard as this risks warping the blade and removing more material than is required. Run the full length of the blade through the sharpener, right to the tip (position 2).
Step 3
Repeat 4 or 5 times, making sure to only pull the knife through; never push. Lift the blade out after each stroke and place back into the starting position ready for the next pull (positions 2 to 3).
Step 4
For sharpeners with 2 or more stages, repeat the process through the finer grades in order to polish and refine the edge. Once the process is complete, wipe the blade clean of any metallic filings that have been produced.
How to use an electric tabletop sharpener
The process for an electric tabletop sharpener is the same as above; however, less pressure will need to be applied as the motor will do more of the work for you.
Benefits of a sharp knife
Knives are the most important piece of equipment in any chef’s toolkit. Keeping kitchen knives sharp is important for the following reasons:
- Enables you to work faster. Chopping becomes quicker and easier, with fewer mistakes speeding up the cooking process.
- Allows for greater control. Food can be sliced as thinly as is needed. A sharp knife will also glide more easily through food, creating the shape you want.
- Creates less damage to food. Less chance of squashing rather than cutting. Food with delicate leaves can also be cut easily and neatly, avoiding tearing and discolouration.
- Is safer. The sharper a blade, the less pressure that needs to be applied. The more pressure used to cut through food, the greater the chance the knife will slip or go astray.
Why sharpen knives yourself?
Many working kitchens pay for their knives to be sharpened regularly by a professional knife sharpener. This may be the most practical option for larger kitchens; however, it is not always the most convenient option.
Frequency: Outsourcing your sharpening can leave you frustrated when a knife becomes blunt between appointments with the sharpener. Doing the sharpening yourself ensures that knives are at their sharpest exactly when you need them to be.
Grind: This degree of autonomy also allows you to sharpen the edge of each blade to the exact grind you prefer.
Grind, or bevel, refers to the angle at which the edge of the blade is sharpened and, subsequently, the shape that it forms. The more acute the angle, the sharper the blade will be. However, this can come at the expense of durability.
Care: No-one cares more about your favourite knife than you. Performing the sharpening yourself guarantees that the utmost care will be taken. This can be important as grinding wheels often remove a lot of material during the sharpening process, which can throw the knife off balance and reduce its lifetime. By taking on the job yourself, you have complete control over how vigorously you sharpen each blade.
If you are interested in purchasing a knife sharpener for your kitchen, contact us or visit our product pages to look at the different devices on offer. To find out more about knife care and the correct way to use the knives in your kitchen, following these links:
10 Most Common Chef Knife Care Mistakes and How to Stop Making Them
Guide to Sushi and Sashimi Knives
Frequently Asked Questions About Granton Edge Blades
Guide to Carving and Slicing Knives
1 February 2017